Set up your shop
If you already run a Shopify shop and make what you sell, setting up Atlessa is a short, ordered path: bring your products across from Shopify, add the making layer on top (materials and recipes), then load the stock you hold so your shelves in Atlessa match your workshop. Each step feeds the next, so by the end you can receive deliveries, make batches, and fulfil orders for real. To explore first, load the sample shop and come back when ready.
Steps
- Import your Shopify catalog.
Your products live in Shopify and stay there: Atlessa reads them, not replaces them. On Home, the setup journey has an Import from Shopify node; run it and Atlessa pulls your products and variants in, ready for the making layer on top. Nothing about your storefront changes. This is the foundation every later step leans on. (For why the two systems split this way, see What Atlessa is.)
- Add your materials.
Materials are the ingredients, components, and packaging you buy and consume. Shopify has no concept of them, so you add them in Atlessa. A handful? Add them one at a time (see Materials). Many? The faster path is the Import materials CSV, which brings your whole list in at once.
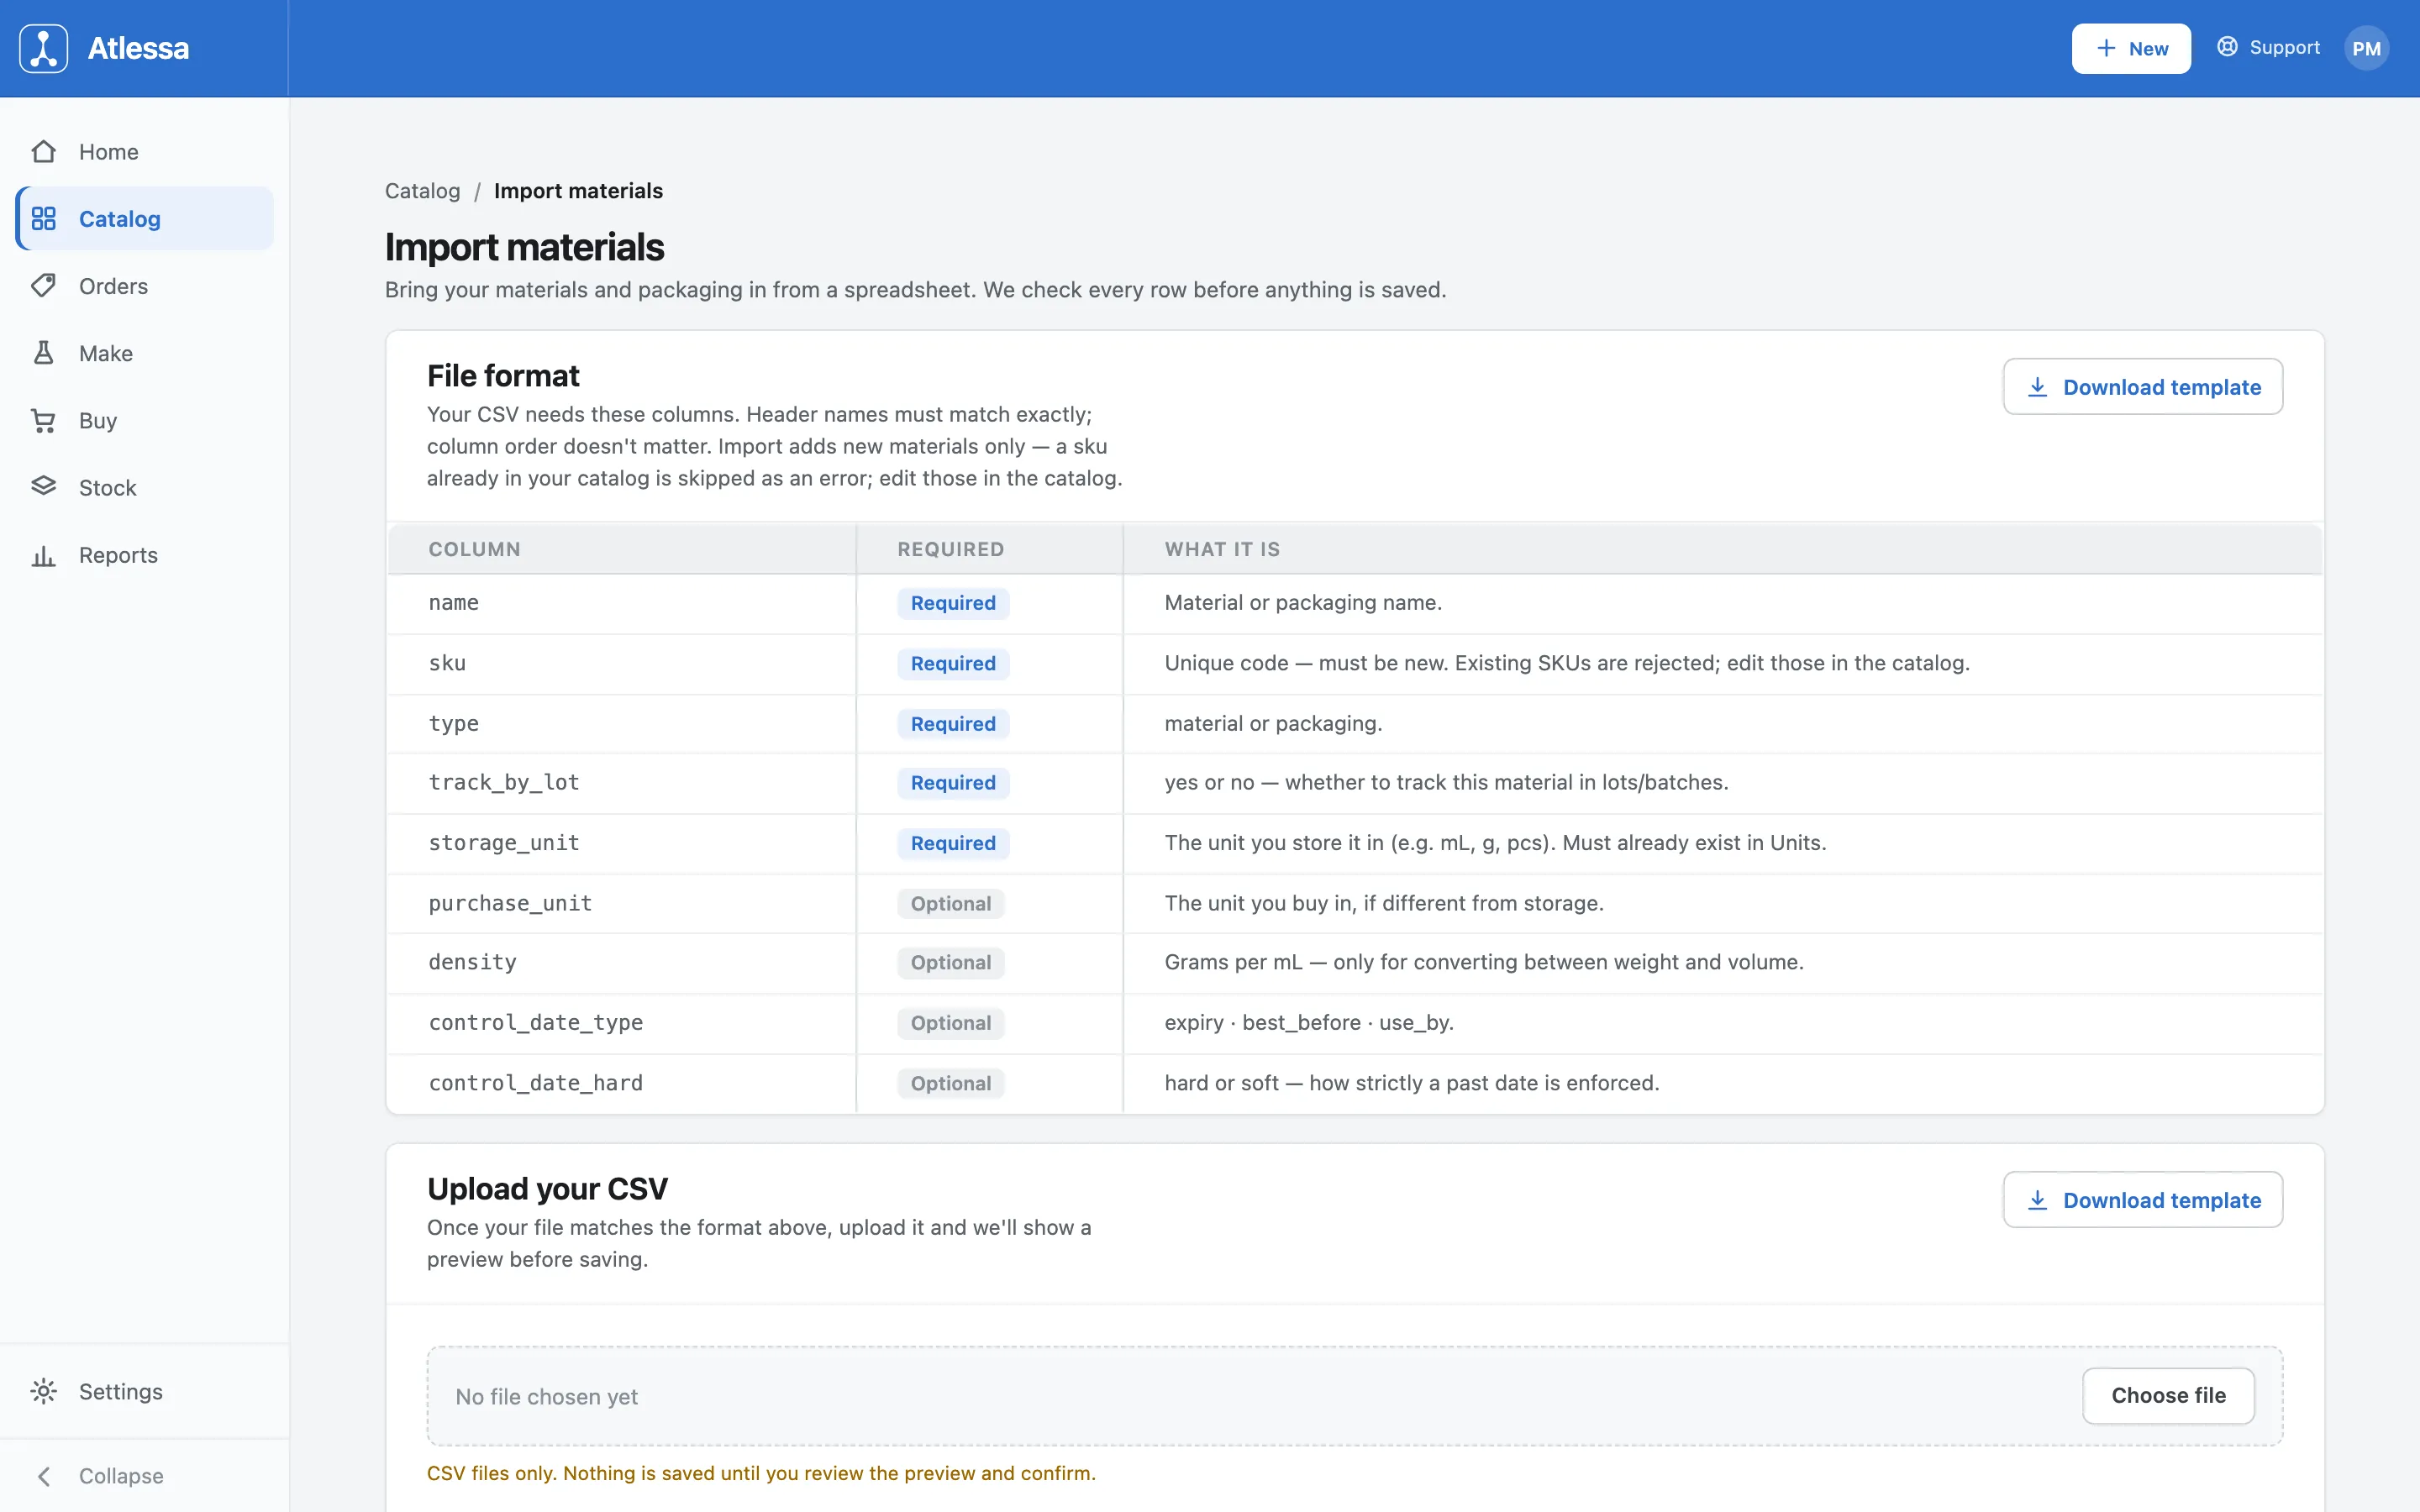
Import materials: bring your materials and packaging in from a spreadsheet, with a downloadable template and a columns guide. Every row is checked before anything is saved. Use Download template to start from the right shape, then fill the columns:
- name (required).
- sku (required, and must be new: an existing SKU is skipped as an error, never overwritten).
- type (material or packaging).
- track_by_lot (yes or no: whether Atlessa batch-traces the item).
- storage_unit (must already exist in your Units).
- purchase_unit (optional, if you buy in a different unit than you store).
This import only ADDS new materials; to change one already in your catalog, edit it there. Every row is validated first, so a bad row is flagged, not half-imported.
- Build your recipes.
Now tell Atlessa what your made products are made of. Give each a bill of materials, listing what goes into a unit and how much. That lets Atlessa know what a run needs, what a product costs to make, and how many you could build from materials on hand. Without recipes the making side has nothing to work from, so this step turns your catalog and materials into a shop Atlessa can run. See Bills of materials.
- Load your opening stock.
Your workshop already has stock on the shelf, so tell Atlessa what you hold. Use Import stock, the CSV path for opening balances (and, later, any bulk top-up). Each row is recorded as a receipt. The columns:
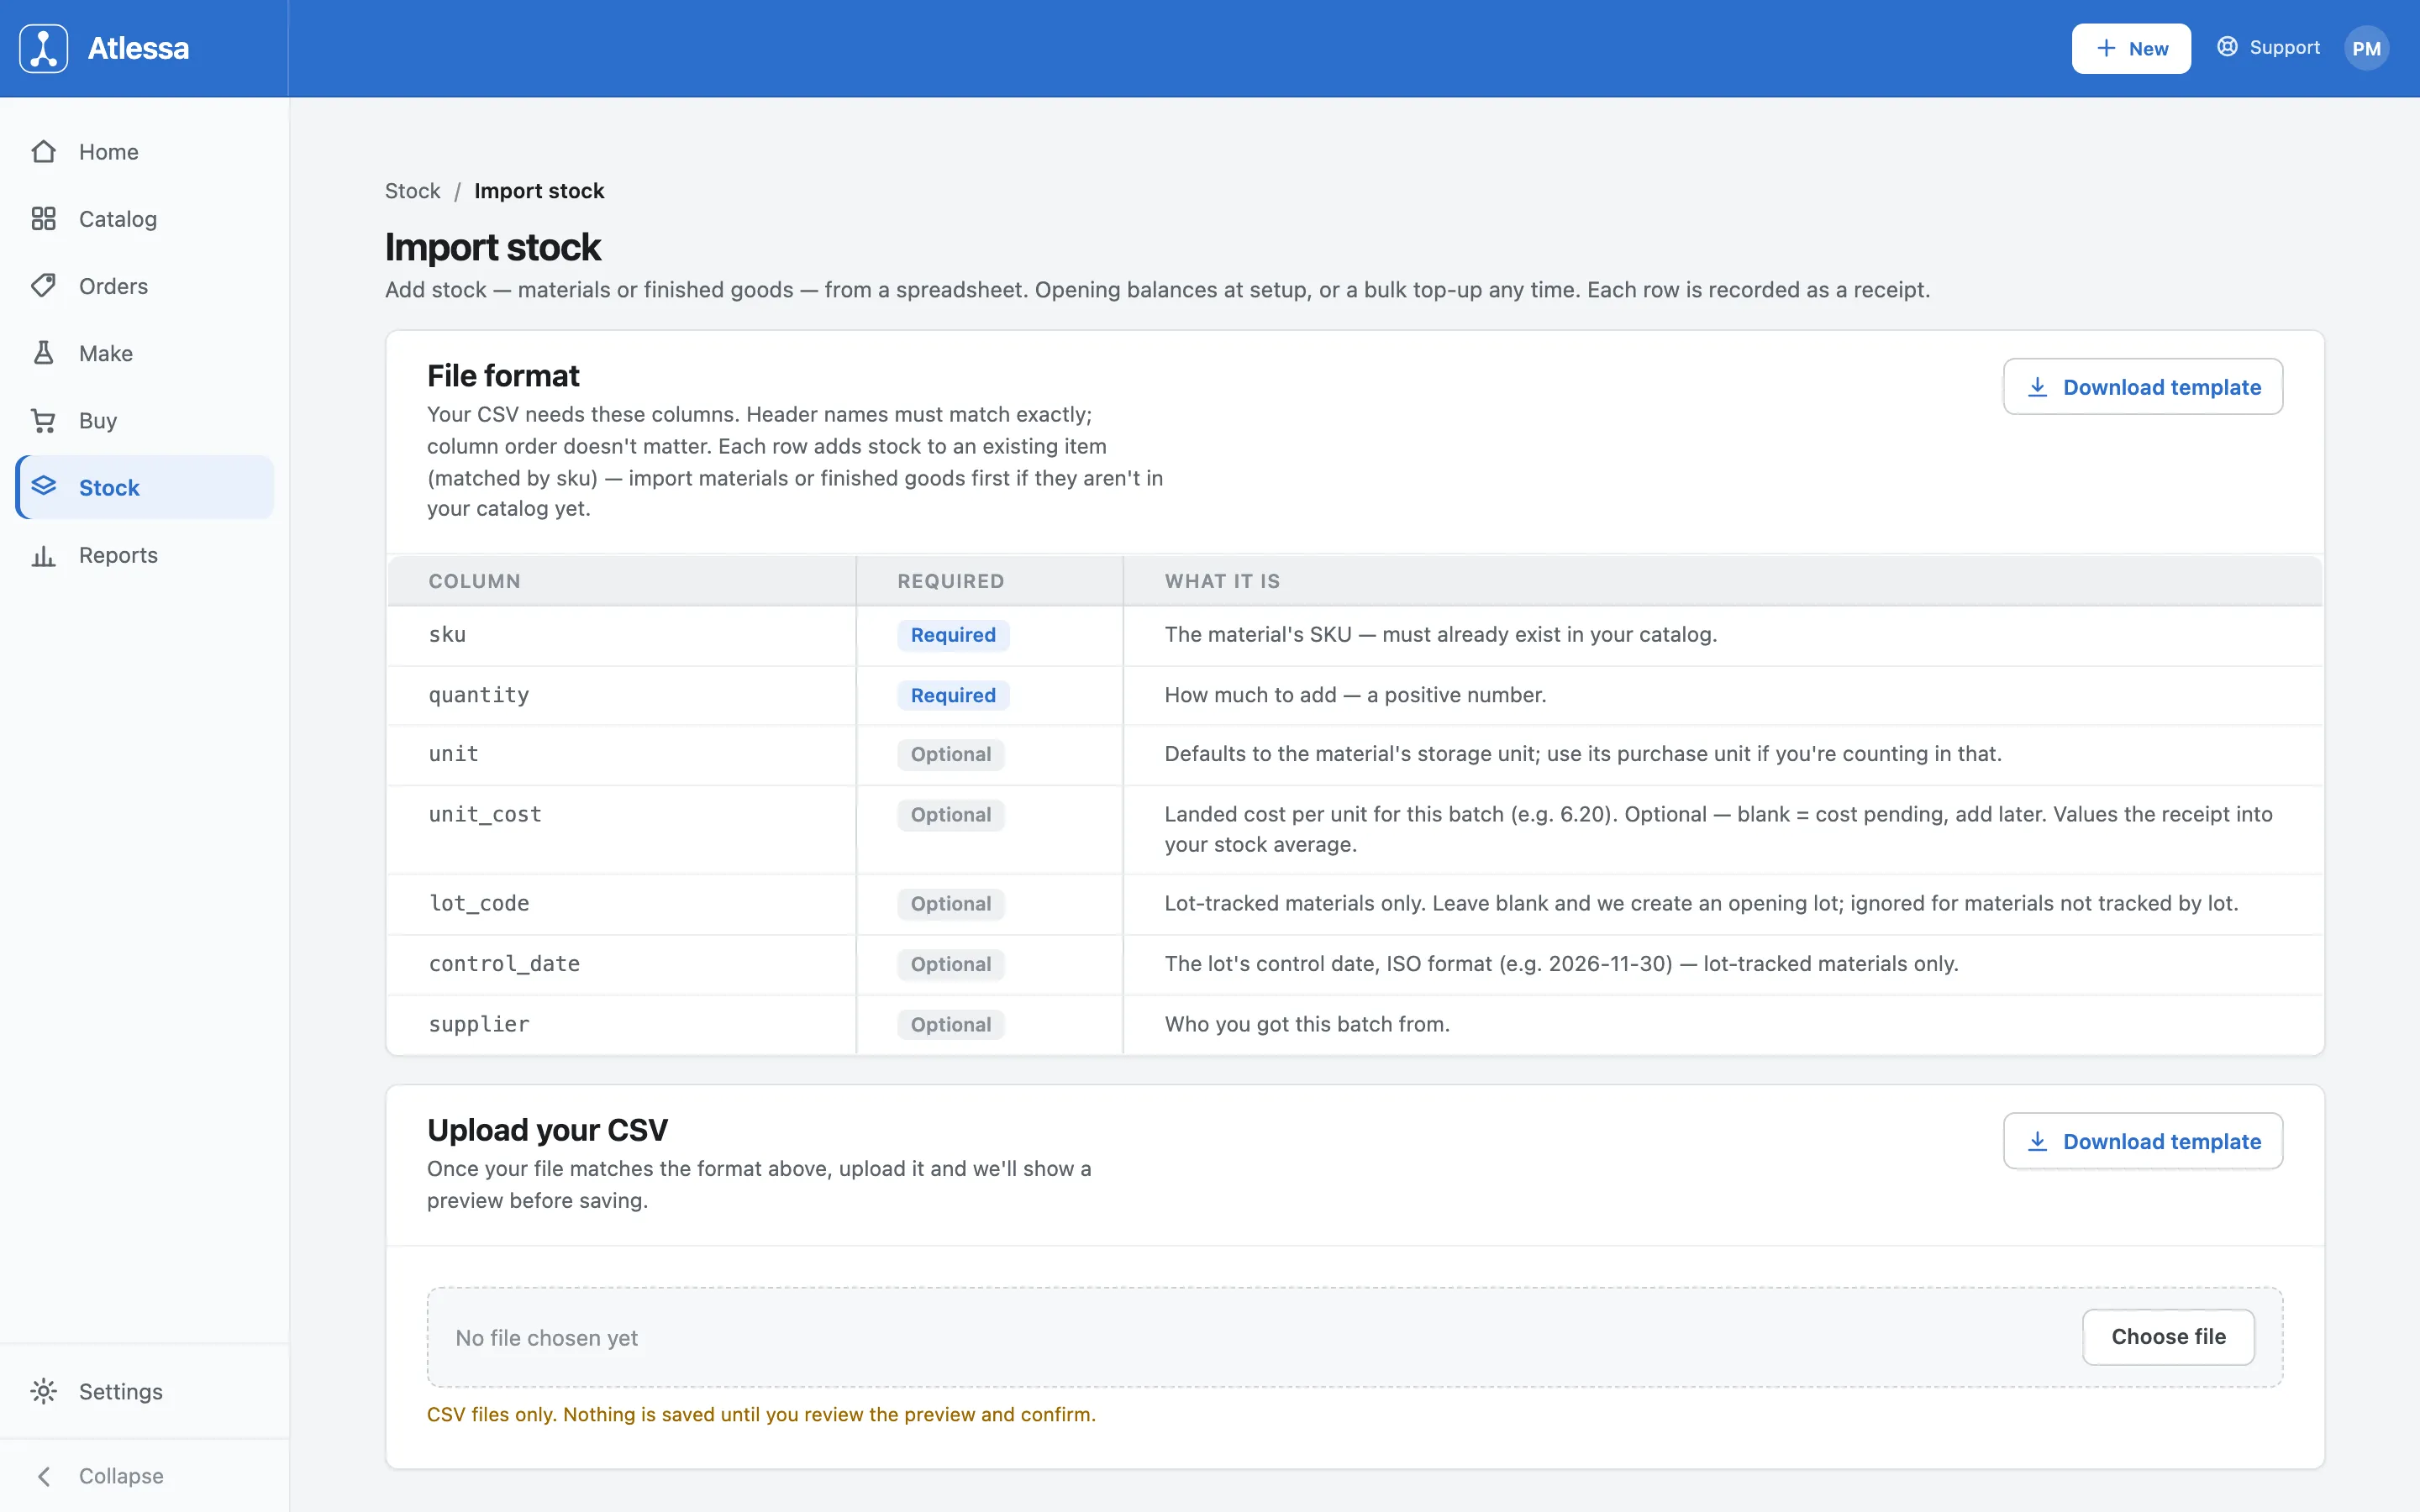
Import stock: load opening balances for materials and finished goods from a spreadsheet. Each row books in as a receipt, so your Atlessa stock matches the shelf. - sku (must already exist in your catalog, so import materials and finished goods first if they are not in yet).
- quantity (a positive number).
- unit (optional, defaulting to the item's storage unit).
- unit_cost (optional; blank means the cost is pending).
Each row books in as a receipt, like a real delivery, so your opening stock lands on hand and traceable from the start. Leave a cost blank and the stock is still counted; it waits for a price you set later.
- Back-fill the lot details.
Bulk-imported opening stock often lacks lot codes, per-batch costs, or control dates. Fill them in afterwards with Update stock details. It defines batches, sets each batch's landed cost, and records control dates on stock you already hold, all WITHOUT changing the quantity, so your counts stay exactly as imported while the detail gets richer. Set a price on any cost-pending lot the same way (Set landed cost). Covered in full in Correct and adjust stock.
Common questions
- Where do my products come from?
- From Shopify. Atlessa reads your products rather than creating them, so you bring them across with Import from Shopify on the Home setup journey, giving the making layer (materials, recipes, stock) something to attach to. Your storefront and product records stay in Shopify, untouched.
- Do I add materials in Shopify or in Atlessa?
- In Atlessa. Materials are the ingredients, components, and packaging you buy and consume, and Shopify has no concept of them. Add a few one at a time in the catalog (see Materials), or bring a whole list in with the Import materials CSV.
- Can I bulk-import instead of adding everything by hand?
- Yes. Two CSV imports with downloadable templates: Import materials adds new materials and packaging, and Import stock books opening balances. Both check every row before anything is saved, so a bad row is flagged rather than half-loaded.
- What if I import stock without costs?
- The stock is still on hand and countable, just marked cost-pending until you give it a price. Set it later with Set landed cost or Update stock details. Nothing is lost by importing first and costing afterwards, often the quickest way to load your shelves.
- How do I add lot codes or control dates to stock I already imported?
- Use Update stock details. It defines batches, sets per-batch cost, and records control dates on stock you already hold, without changing the quantity. It is the tool for back-filling detail after a bulk import (see Correct and adjust stock).
- What is the difference between Import stock and Update stock details?
- Import stock ADDS quantity: each row is booked as a receipt, so your on-hand goes up. Update stock details changes the detail of stock you already hold (batches, costs, control dates) WITHOUT adding quantity. Use Import stock to load what is on the shelf; Update stock details to fill in lot codes, prices, and dates afterwards.
If it is not working
- My materials import was rejected.
- Two things reject rows most often: a sku that already exists is skipped (Import materials only adds new items, never overwrites), and storage_unit must already exist in your Units. Read the error rows, fix the SKUs or add the missing units, and re-run.
- An imported item has no cost.
- Expected if you left unit_cost blank on Import stock: the stock is cost-pending, on hand but waiting for a price. Give it one with Set landed cost (or Update stock details), and it folds into your stock average from there.
- Imported stock is not lot-traced.
- Batch tracing follows the material's track_by_lot setting, so if an item came in without lots, set track_by_lot to yes on the material and use Update stock details to define the batches on stock you already hold. That gives existing quantity its lot codes without changing the count.